
Introduction
Are you tired of struggling with complicated setups and technical jargon when trying to create a public
internet WHIP service for OBS? Look no further! In this comprehensive guide, we will walk you through the
process of effortlessly building your own WHIP service using the Oryx, all with just a single click.
Say goodbye to the complexities of security, authentication, and WebRTC, and embrace the future of sub-second
live streaming and seamless OBS-RTC room connections.
Join us as we break down the barriers of online streaming and help you unlock the full potential of OBS’s
WHIP support. Our easy-to-understand, step-by-step tutorial will empower you to create a secure and efficient
WHIP service, revolutionizing your online meeting and live streaming experience. Don’t let technical
challenges hold you back any longer – dive into our guide and start streaming like a pro today!
Step 1: Create Oryx by One Click
Creating an Oryx is simple and can be done with just one click if you use Digital Ocean droplet.
Please see How to Setup a Video Streaming Service by 1-Click for detail.
You can also use Docker to create an Oryx with a single command line:
docker run --restart always -d -it --name oryx -v $HOME/data:/data
  -p 80:2022 -p 443:2443 -p 1935:1935 -p 8000:8000/udp -p 10080:10080/udp
  ossrs/oryx:5
After creating the Oryx, you can access it through http://your-server-ip/mgmt via a browser.
Step 2: Get the WHIP URL from Oryx
Please download OBS version 30 or higher from this link
and proceed with the installation.
Open the Oryx, select Scenarios > Streaming > WebRTC: WHIP OBS, and follow the instructions to
get a WHIP URL for OBS.
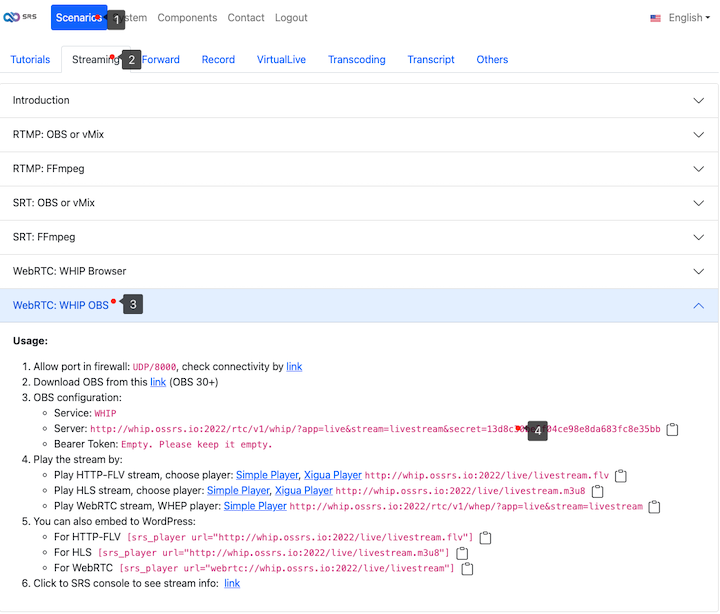
Please copy the WHIP URL as we will use it in OBS. Be aware that the WHIP stream can be played using the
WHEP player or embedded into your WordPress website.
Step 3: Publish WHIP via OBS to Oryx
Next, launch OBS and select Settings > Stream. Choose WHIP from the Service drop-down menu, and set
the WHIP URL into the Server field.
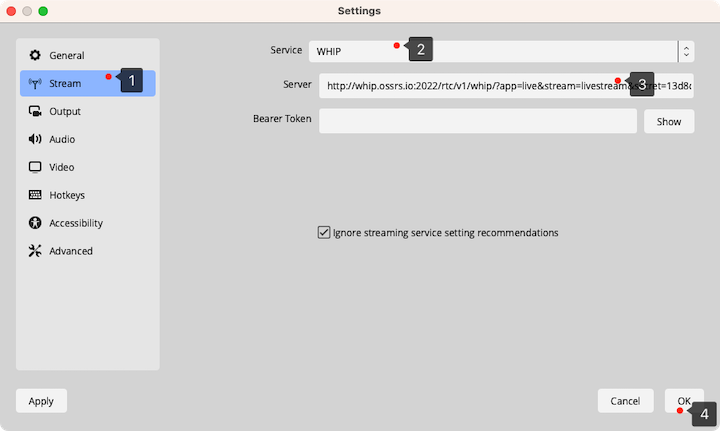
Now you can click the Start Streaming button to publish the WHIP stream to the Oryx.
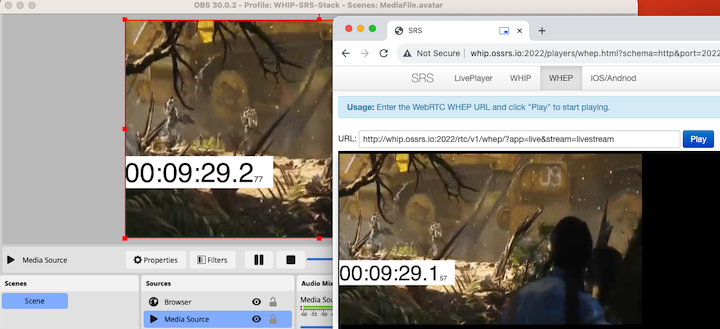
Step 4: Use WHEP to View the Stream
After publishing the stream, you can view it with a WebRTC HTML5 player. Access the WHEP player from the
Oryx dashboard.
Additionally, integrate the WHEP player within your WordPress website. Kindly adhere to the guidelines
provided on the Oryx dashboard.
Cloud Service
At SRS, our goal is to establish a non-profit, open-source community dedicated to creating an all-in-one,
out-of-the-box, open-source video solution for live streaming and WebRTC online services.
Additionally, we offer a Cloud service for those who prefer to use cloud service instead of building from
scratch. Our cloud service features global network acceleration, enhanced congestion control algorithms,
client SDKs for all platforms, and some free quota.
To learn more about our cloud service, click here.
Conclusion
In conclusion, our comprehensive guide has provided you with a simple and efficient method to create a public
internet WHIP service for OBS using the Oryx. By following our easy-to-understand, step-by-step tutorial,
you can now effortlessly build your own WHIP service with just a single click, eliminating the need to grapple
with complex security, authentication, and WebRTC issues. With this newfound knowledge, you can revolutionize
your online meeting and live streaming experience, fully harnessing the power of OBS’s WHIP support for
sub-second streaming and seamless OBS-RTC room connections.
Contact
Welcome for more discussion at discord.
